
Making a Garlic Roaster
Designing a miniature ceramic roaster inspired by the Moroccan tagine

The Problem
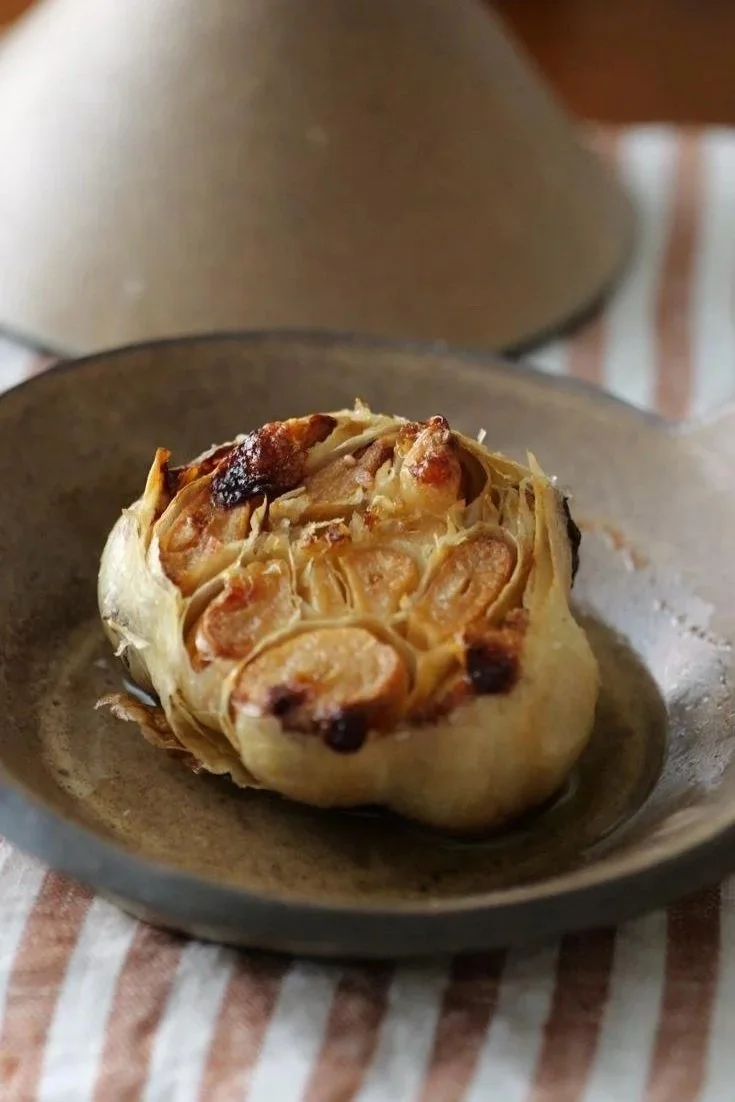
I’m completely transfixed every time I see a video of a chef roasting a whole head of garlic in the oven, then squeezing the softened cloves from their skins. It’s oddly satisfying and just unsettling enough to make you wonder why you're still watching, especially when the cloves begin to slip out, escaping from their pores in long extruded strings. And yet somehow, instead of putting me off, it makes my mouth water. I can almost smell the roasted garlic through the screen.

The problem is that nearly every video or tutorial I come across involves wrapping the garlic in a considerable amount of aluminum foil before putting it in the oven. It works, obviously, but it also seems like an unnecessary amount of disposable material for something so small.
So I started wondering whether the foil could be replaced with a clay vessel.
What if there were a tiny ceramic dish made specifically for roasting one head of garlic? Something just large enough to hold the bulb, with a lid that could trap heat and moisture while it was cooked. Once the garlic was roasted, the lid could come off and the whole thing could stay right there on the table.
A very small piece of cookware for a very specific job.
Designing the form
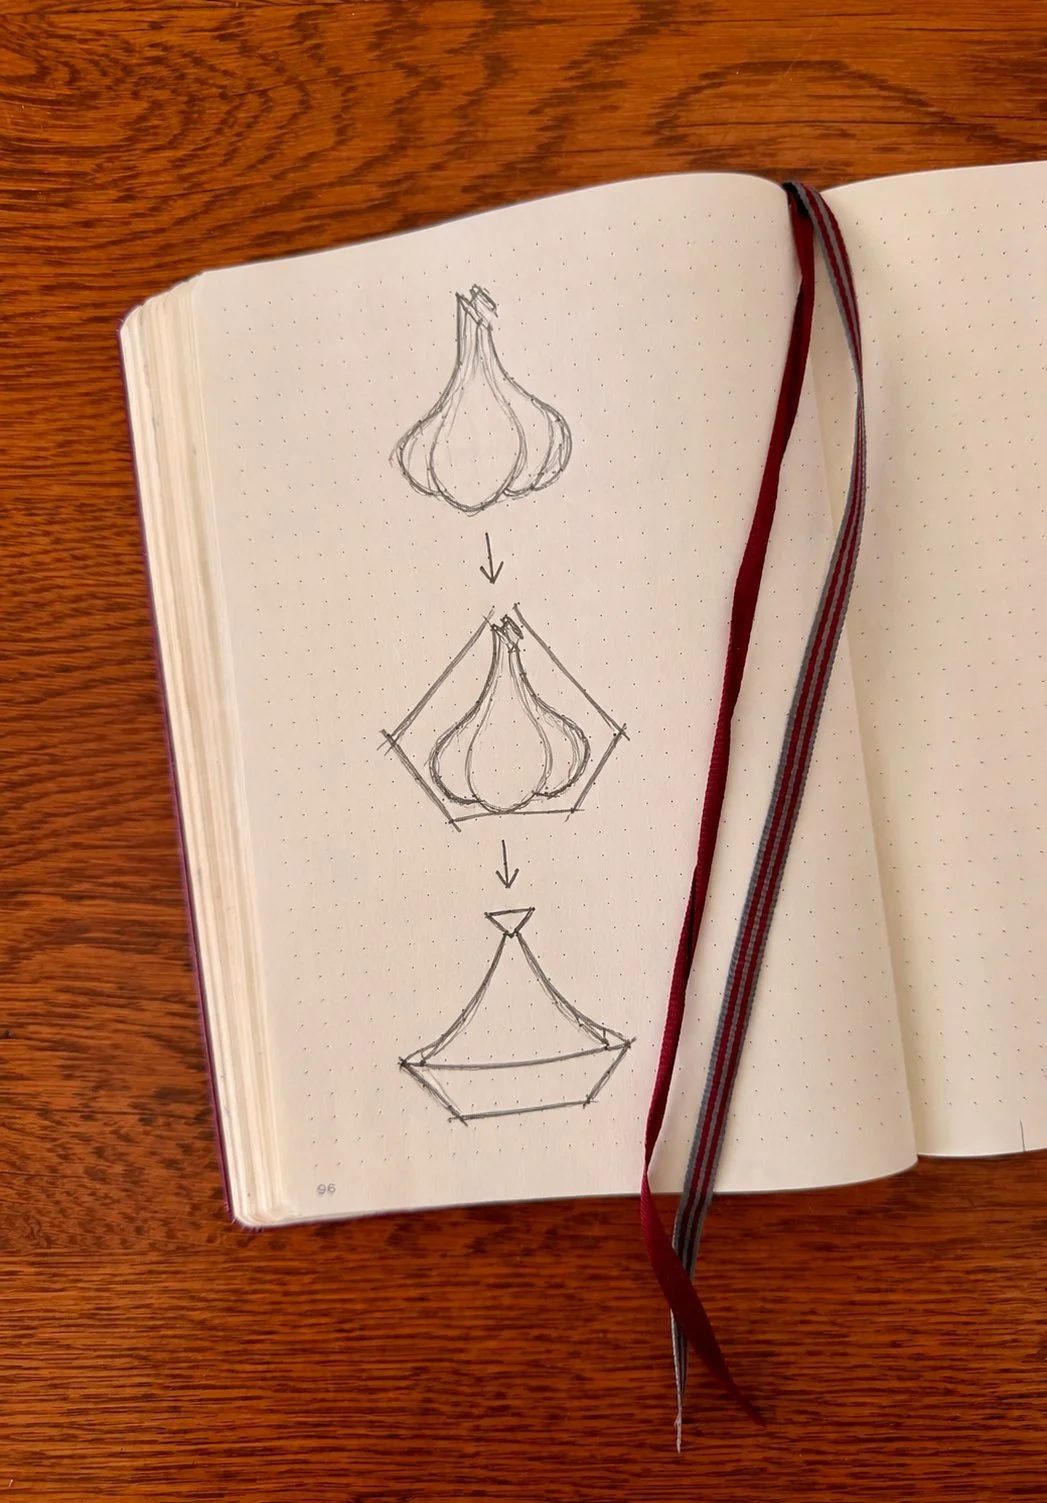
As I started sketching ideas, I kept reducing the shape of the garlic itself.
A rounded base. A narrowing top.
Reducing the form to a few simple straight lines, the silhouette started looking familiar.
It reminded me of a tagine.
Two summers ago, I traveled through Morocco on a trip with my parents, where I ate some of the best meals of my life served from traditional tagines. The form had apparently been sitting somewhere in the back of my mind ever since.
A typical Moroccan tagine is large enough to cook and serve an entire meal. Mine only needed to fit one head of garlic.
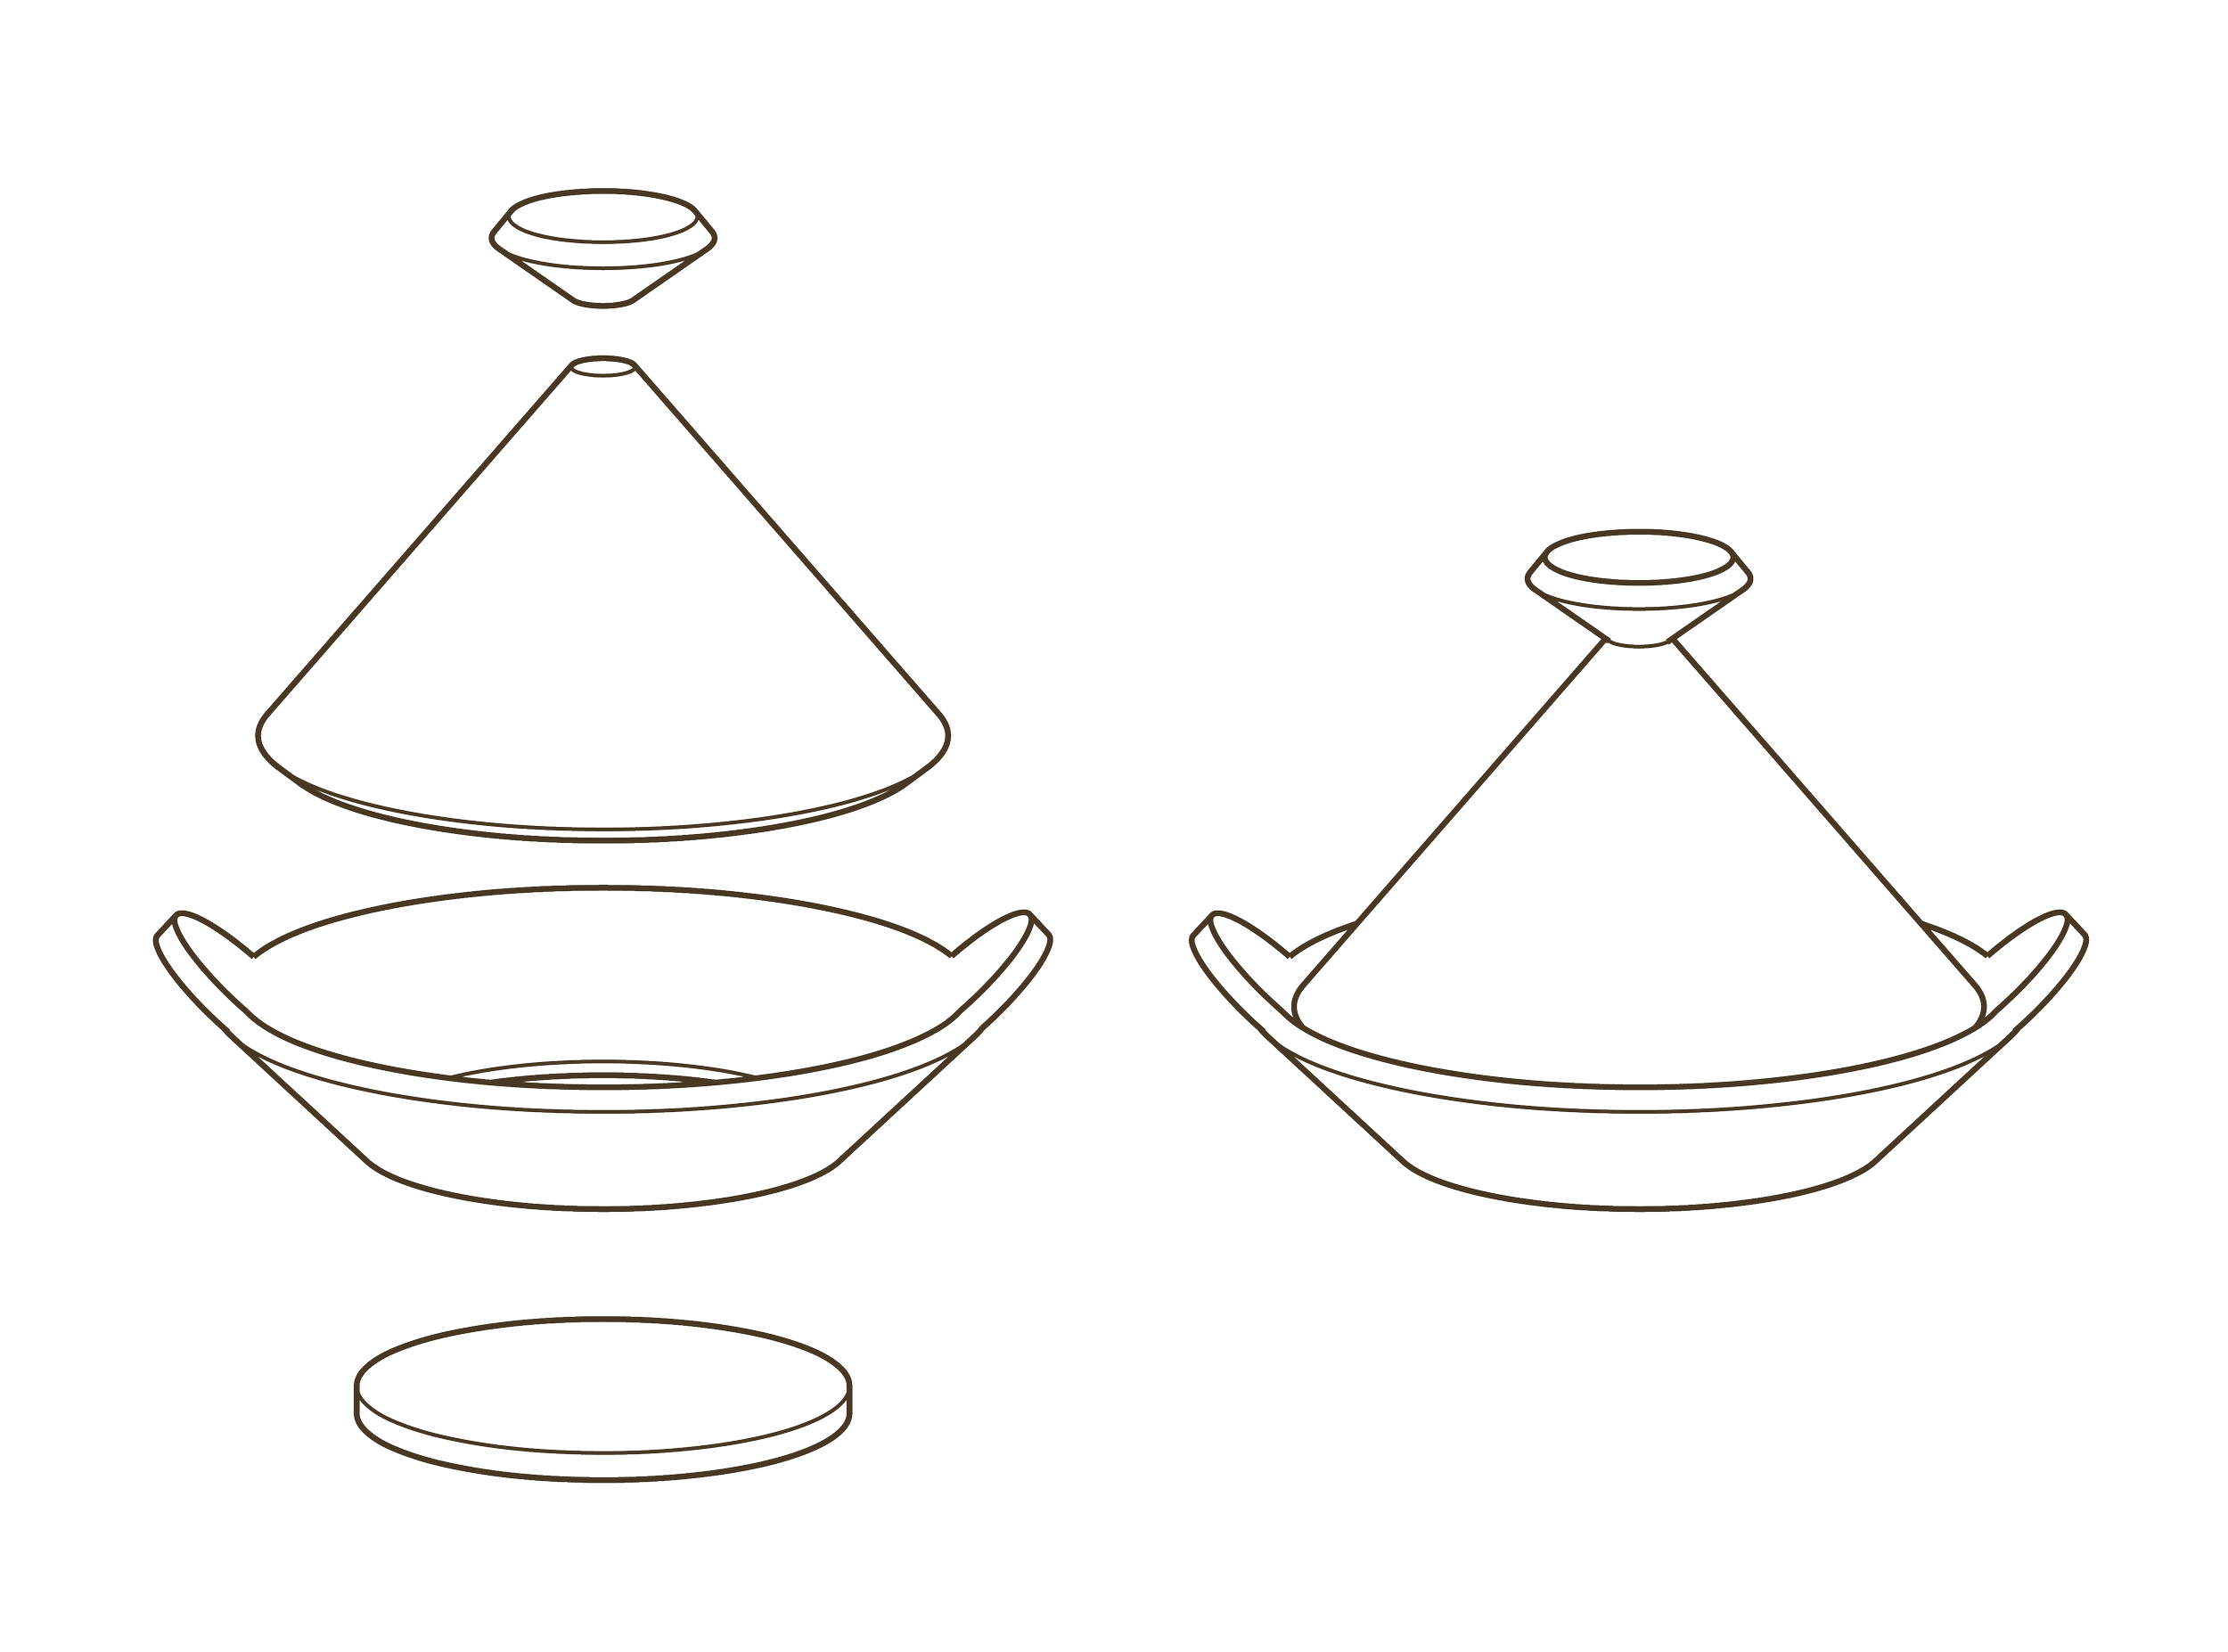
So I borrowed the basic logic of the form and shrank it down almost absurdly small: a shallow dish at the bottom and a wide conical lid above it.
The result is part garlic bulb and part miniature tagine: a very specialized piece of kitchen equipment.
Making the Garlic Roaster
The roaster is made from four pieces of slab-built clay: a circular base, a tapered wall, a conical lid, and a small knob.
I begin by rolling a slab of clay and cutting each piece using the paper template I designed with architectural CAD software.
The straight edges are cut at slight opposing angles so that, when they are joined, the seams meet more cleanly and have a little more surface area to connect.
Building the lid

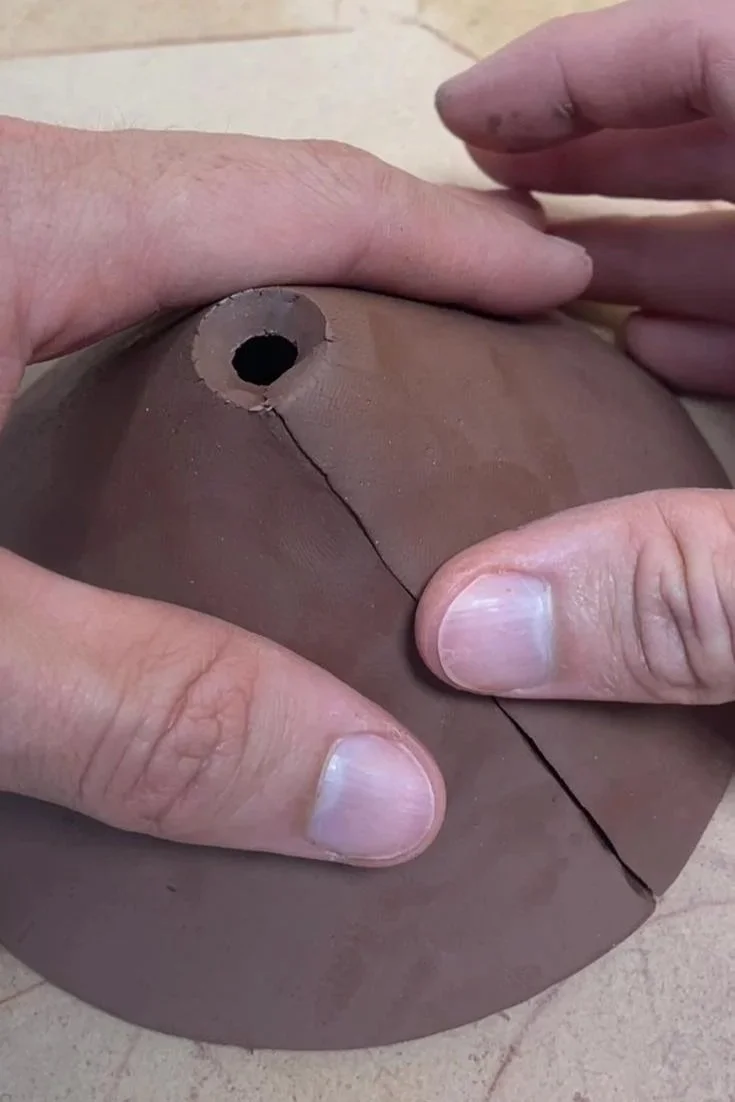

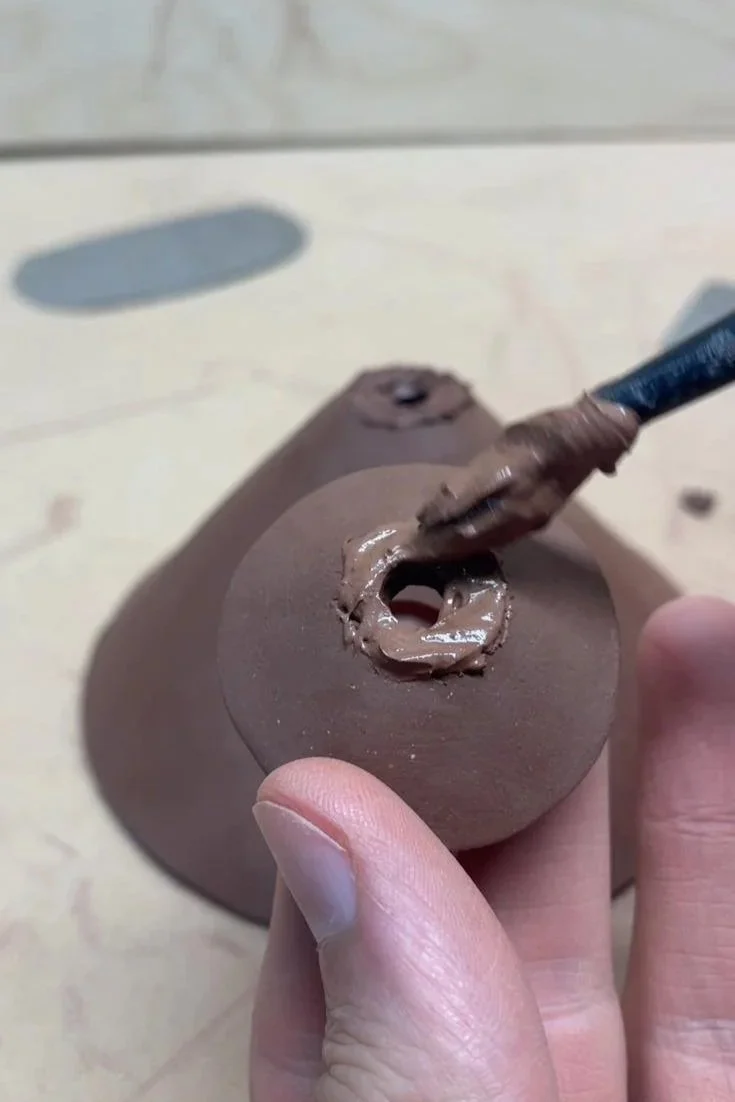
The largest lid piece begins flat.
Its two straight edges are brought together and joined to create the cone, leaving a small opening at the top. A second piece is formed into the knob and attached above it.
At this scale, the exaggerated proportions of the cone feel slightly ridiculous, which is part of what I like about it.
Building the dish


The lower half is similarly simple.
A tapered strip of clay is joined into a short wall, then attached to a circular slab to create a shallow dish with tabs for handles.
The proportions are designed around the size of one head of garlic, with enough room for the bulb to sit comfortably inside without making the object much larger than it needs to be.
Before the pieces dry, I test the lid and dish together and make any final adjustments to the fit.
Once completely dry, the two pieces are bisque fired, glazed, and fired again.
Then it’s time to test it out!

How to Roast Garlic in it


Using the roaster is intentionally simple.
Remove any loose papery layers from a whole head of garlic, then slice roughly ¼” to ½” from the top to expose the cloves.
Place the bulb cut-side-up in the ceramic dish, drizzle olive oil over the exposed cloves, and add salt, pepper, herbs, or whatever else you like.

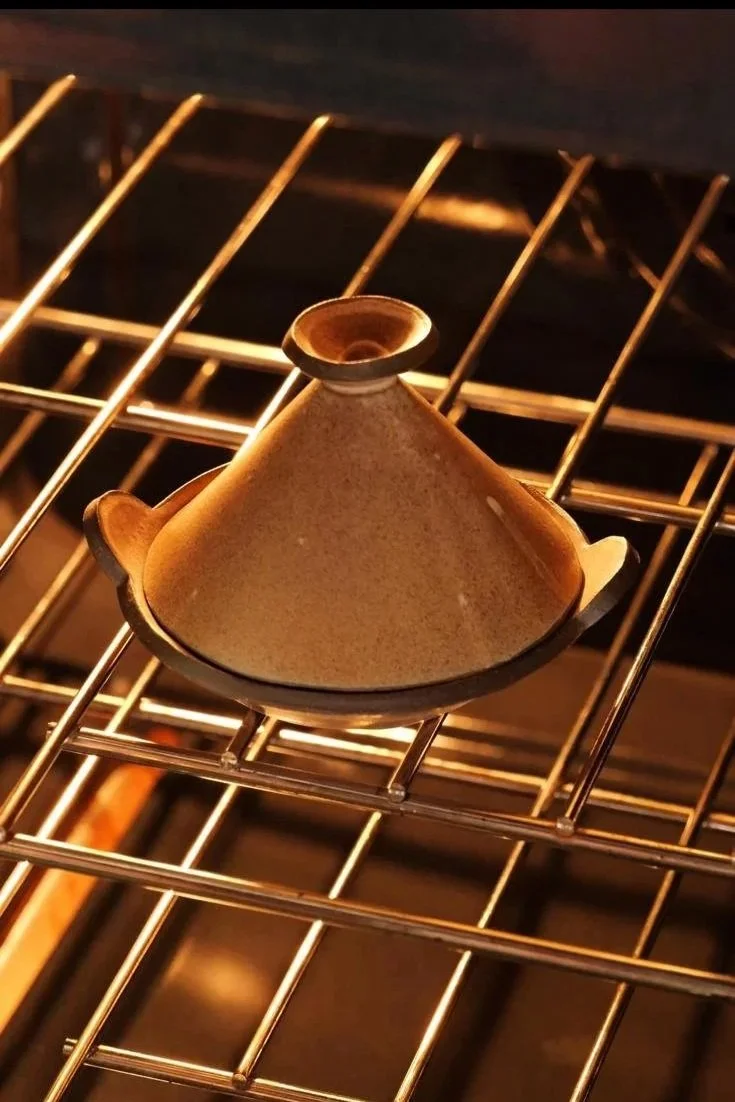
Put the lid on and roast at 400°F for about 45 minutes, or until the cloves are completely soft and golden.
Let the garlic cool slightly before squeezing from the base of the bulb.
If everything has gone according to plan, the cloves should slide straight out of their skins.
Which remains both satisfying and a little unsettling. The first time I used mine, I was immediately ready for round 2! The garlic tastes delicious spread directly on a piece of toast, or it can be used in any number of dishes. Almost everything I cook begins with onions and garlic.


The whole shebang: flat slabs of clay to roasted head of squeezable garlic.
More projects from the Slabberdashery

Make your own ceramic pour-over coffee set using clay slabs. This downloadable PDF project guide includes printable pottery templates and step-by-step instructions for three coordinating pieces: a 16-ounce pitcher with a handle, a pour-over cone, and an arched support for the cone.
Designed for makers with some slab-building experience, the guide includes templates for constructing a reusable drape mold and optional craft-foam designs for adding texture and pattern. You should be comfortable attaching clay slabs and blending seams.
The 21-page PDF guide includes:
• A detailed list of project materials and tools.
• Instructions for printing the guide.
• Step-by-step instructions for making all three ceramic pieces and constructing a reusable drape mold.
• Useful tips and fun facts.
• 12 pages of templates for cutting clay slabs and assembling the drape mold.
• 5 pages of optional design patterns for making reusable craft-foam texture templates.
You will receive a download link immediately after purchase. The PDF is formatted for printing on US Letter paper.
This is a digital download. No finished ceramics or physical materials are included.

Make your own ceramic barware set using clay slabs. This downloadable PDF project guide includes printable pottery templates and step-by-step instructions for five vessels: a wine goblet, beer stein, cordial vessel, martini goblet, and cocktail coupe.
Designed for makers with some slab-building experience, the guide includes templates for constructing a drape mold and optional craft-foam designs for adding texture and pattern.
This is a digital download formatted for printing on US Letter paper. No finished ceramics or physical materials are included.
The 20-page guide includes:
A detailed list of project materials and tools (also listed below, so that you can see what you’ll need before purchasing the guide.)
Instructions for printing the guide
Step-by-step instructions on how to make each of the five vessels that make up this set
Fun facts and useful tips
7 pages of templates for cutting out slabs and assembling a drape mold.
6 pages of optional design patterns for making reusable craft-foam texture templates.
You will be sent a link immediately following your purchase to download the pdf guide. It’s formatted for easy printing on US Letter paper size only.

Make your own ceramic butter dish using clay slabs. This downloadable PDF project guide includes printable pottery patterns and step-by-step instructions for creating templates, constructing a mold, and building your butter dish.
Designed for makers looking to develop their handbuilding and slab-construction skills, the guide also includes design alternatives to help you personalize your piece.
The 7-page PDF guide includes:
• A detailed list of project materials and tools.
• Instructions for printing the guide.
• Step-by-step instructions for making templates and a mold for slab building.
• Instructions for constructing the butter dish.
• 3 patterns for cutting template pieces.
• 2 pages of design alternatives.
You will receive a download link immediately after purchase. The PDF is formatted for printing on US Letter or A4 paper.
This is a digital download. No finished ceramics or physical materials are included.

Make your own ceramic taco stand using clay slabs. This downloadable PDF project guide includes printable pottery templates and illustrated step-by-step instructions for constructing a reusable drape mold and forming your taco stand.
Personalize your stand with optional designs that incorporate condiment holders and a shot-glass holder.
The 21-page PDF guide includes:
• A detailed list of project materials and tools.
• Instructions for printing the guide.
• Illustrated instructions for preparing template pieces, assembling a reusable drape mold, and constructing the taco stand from clay slabs.
• 16 pages of templates for cutting clay slabs and assembling the drape mold.
• Alternate designs incorporating condiment holders and a shot-glass holder.
You will receive a download link immediately after purchase. The PDF is formatted for printing on US Letter paper.
This is a digital download. No finished ceramics or physical materials are included.